Recipes in four sentences

Monday, June 27, 2016

A Homespun Year...Dreamy Dreamcatcher DIY....

 
I adore Dreamcatchers, and have admired them for years. Alas they are an expensive item if purchased, even when made by a local artisan. But you can make one yourself, with a few scraps of this and that, and an hour or so of your time.
 
I made this gorgeous one in neutral tones, for a birthday gift for one of my daughters friends. It was ooh-ed and ahh-ed over and now everyone wants one!
 
A Dreamcatcher this size with the added details of the shabby rosettes would sell at our Arty Markets for around $75-$95, and cost us about $10 to make. Granted we were using scraps already on hand, but if you had to buy everything you needed, you'd still spend under $20, and you'd have enough for at least 3 Dreamcatchers.
 
You'll need:
 
1. Bamboo hoop, any size. Try to keep the scale of your hoop and doiley similar. A tiny doiley in the middle of a huge hoop won't look right. The doiley needs to be centred, but with some space around it to leave room to stretch it tight. The hoops are available at Haberdashery, Craft and Embroidery suppliers and are very inexpensive. They are usually with the floristry supplies and silk flowers, as they're commonly used for wreaths and flowergirl hoops.
 
2. Lace Doiley...mine was from a thrift store and was just -20c. You can also buy them in the Discount and Dime stores in packs of 5 or 6 in varying sizes, for around $3, so either way, they're not expensive either. Imagine using vintage doileys...how pretty!
 
3. Wool, ribbon and lace in toning colours for the streamers. You'll also use this to tie the doiley to the hoop.
 
4. Scraps of fabric in three toning colours or prints to make the Shabby Rosettes.
 
5. Needle and thread.
 
6. Hessian tape and pen for the sweet little 'Be Brave Little One' tag, if you want one.
 
 
Start by laying your hoop on your work surface (I sat on the floor), and centering the doiley. Thread twine, yarn, ribbon or lace through as many strategic points on the doiley as possible. The more anchors you have, the more stable and strong, your Dreamcatcher will be. I used toning yarn to anchor mine, and threaded it through each 'point' on my doiley.
 
 
Start tying your points off, knotting each one securely. You must alternate sides when doing this to ensure your doiley is centred. So imagine your Dreamcatcher as a clock face. Start at 12 o'clock, tie it off, then drop down to 6 o'clock and anchor that point. Then move to 9 o'clock, then to 3 o'clock. 11 and 5 o'clock, 1 and 7 o'clock, 10 and 4 o'clock, and so on.
 
 
 By the end, you should have securely anchored doiley, centred and tight as a drum.
 
 
Trim all the trailing ends from your knots.
 
 
Now start cutting generous lengths of ribbon, yarn, twine and/or lace for your streamers. You'll be folding them in half to attach them, so make them twice as long as you'd like the finished streamer to be. Fold each in half and start attaching them by folding the loop over the bottom edge of your hoop, and threading the tails through the loop.
 
 
Pull on the tails gently, but firmly to lock your streamers into place.
 
Continue adding streamers, using as many textures as possible. You can use scraps of fabric too, but we had all of this yarn and lace leftover from the Victoriana Ghosts costumes I made, so we were thrilled to be able to use it all up! I love the softer tone on tone look, but of course you can make yours as bright and bold as you want.

 
As you can see, we used feather yarn, bulky yarn, lace, and ribbon. The feather yarn is particularly pretty used on this project as it has a lovely pearly finish.
 
 
Look how gorgeous it is with the sunlight shining through!
 
Now is the time to trim the ends of the tails if you want to. We left ours uneven and shabby looking, but you can trim them straight, or into a triangle point if you prefer.
 
 
These rosettes were another item left over from the costumes I made, so joy of joys...a way to use them up as well! If you'd like to make some of your own, I'll be providing a tutorial for them later this week. They are very simple, I promise!
 
 
I like to press these flat to give them a worn, and shabby look, so I dampen a teatowel, fold it in half lengthwise, and enclose the fabric rosettes in between the two damp layers. I then press them on the highest temperature for about 60 seconds to flatten them well. You can skip this step if you want a fuller looking rosette.
 
 
Next I folded the hessian tape in half, forming a V shape, and wrote my message on the two V tails.
 
I arranged the rosettes and tag where I liked them best, and pinned them into place.
 

 Then I hand stitched them, ensuring that I was catching some of the doiley behind them. You only need a couple of stitches. This is not an item that will be handled very often.
 
 
All done, and I was very happy with the result!
 
 
A few of these would make lovely Christmas gifts, and cost next to nothing to create. You can personalise them in all kinds of ways, attach things to the doiley, vary the colour combinations, and make different sizes. You can even leave the doiley out altogether, and weave a shape with yarn in the middle. I've also seen them empty in the middle, but then they're not really a 'dreamcatcher' are they? There's nowhere for the 'dreams' to 'catch'! They still look pretty though, so you're only limited by your imagination.

I'll be making some more masculine ones soon, using darker, neutral colours, and more rustic looking tree branches. I'll share those when they're done.
 
They're also a popular Wedding decoration at the moment, and I can just envisage a series of these as ceremony and reception decorations at a Boho wedding. Stunning!
 
What do you think?
 
Will you try making your own Dreamcatcher?
...Mimi...

Saturday, June 25, 2016

Five Star Frou-Frou #52...

http://distresseddonnadownhome.blogspot.com.au/2016/06/friday-finds.html
 
Hello all, and welcome to Five Star Frou-Frou #52! Thankyou all for linking your lovely posts last week. It was so hard to choose a favourite, that eventually I went with a theme, and decided to feature those based upon beautiful vintage finds.
 
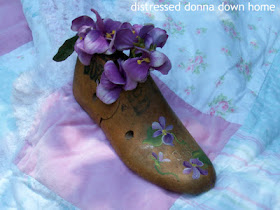
First off the rank was Donna at Distressed Donna Down Home who went bargain hunting and found lots of pretties from lace gowns to this adorable upcycled Shoe Form, seen above.
 
http://www.avintagegreen.com/2016/06/early-june-thrifted-finds.html
 
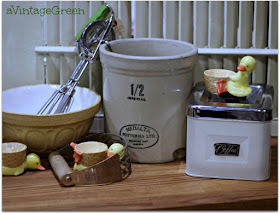
Next, Joy from A Vintage Green, found some equally gorgeous pieces, including these kitchenware items which are just the sort of thing that catches my eye when I'm out trawling garage sales and thrift stores. Love them all!
 
IMAG1262
 
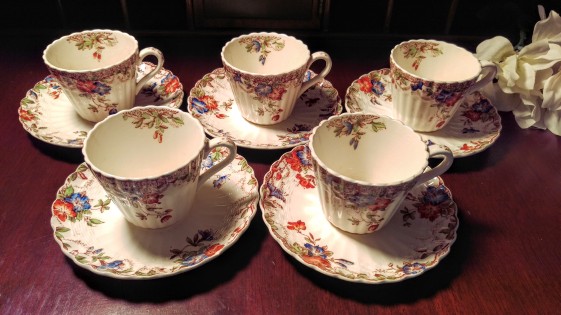
And finally, Vintage Eve's shared a fabulous post on the history of Spode fine china. Spode rank amongst my favourites in beautiful dinnerware, and this is a real insight!
 
Thankyou all. Please show our features some blog love and pay them a visit.
 

Friday, June 24, 2016

Motherly Advice...Let's talk about stress, baby....

Hi Sweetie. Come in, come in. What brings you here today?
 
Ohhhh....you're having one of THOSE days. I know. Unavoidable sometimes. What's happened?
 
I hear you. Yep, that's frustrating. Husbands, kids, dogs. Guaranteed to get the better of you sometimes....hahaha!
 
 
The thing is that it's all a bit of what I call Panic Transferance. As in 'your panic is not my panic'. Yes, you may well laugh, I know you've heard me say it many times *wry grin*.
 
There's certainly no point weeping about it, so come here and give me a hug, and let's talk about how we can fix this....
 
 
So let's see, apart from the fact that everyone in the family is making their panic YOUR panic, what do you see are the main problems here?
 
The reason I ask is because quite often, it just boils down to someone not holding up their end of the bargain, speaking family-wise, I mean. Somebody doesn't get something done, which means that someone else can't do what they need to do.
 
Here's a couple of examples....
 
The girl child, yes that cheeky one of yours with the big baby blue eyes. She doesn't put her unwashed sports uniform in the wash basket and instead leaves it where she's taken it off, on the bedroom floor. It doesn't get washed, so next time she needs it, not only is there a panic to find it (under the pile of washing now kicked under her bed), but apparently it's all YOUR fault for not knowing that she needed it two days later. You, it seems, were meant to intuit that she would fail to put her dirty washing in the laundry basket, go searching for it, wash it, and return it to her room, pristine and ready to go. Right? Wrong! She should have looked at her schedule, known that she needed the uniform clean for the day after tomorrow, and made sure she put it in the laundry basket to be washed. Yep. It's a clear cut case of 'your panic is not my panic'. I guess she'll have to wear a smelly uniform. It won't kill her and if she's ostracized by her buddies for being a little 'on the nose', well maybe she'll remember next time....hahaha!
 
Now that lovely man of yours. What did he say...'you should have known I'd need that paperwork by today'. Well, how could you know if when he gives it to you, he says 'just whenever Honey'. Sometimes, you gotta lead them by the nose (in Equestrian speak) and ask the question 'when do you need this back, Sweetheart?', and don't take 'Whenever Honey' as the right answer.
 
Rules and boundaries Sweetie. You've heard me mention them before. What's that fella on TV....Dr Phil...what's he say? 'You teach people how to treat you?'. Yes, well, a few lessons for the family are needed here I think.
 
First of all, you need to state clearly what you will no longer do, AND state the action you expect from them in future.
 
'I will no longer tolerate you yelling at me when your washing isn't done. You will either put the dirty laundry in the laundry basket, or you will do your own laundry'.
 
'I love you, but I am not a mind reader. If you need something by a certain date, you have to tell me when you leave it with me for finalising.'
 
You get the idea?
 
Now the scary bit. No matter how much they then try to make THEIR panic, YOUR panic, stand firm. Do not let anyone belittle or berate you into feeling bad for their personal mismanagement. And believe me, the first few times you do this, that is almost guaranteed to happen. There'll be ranting and tears (although not yours I hope!), but stand firm, or nothing will ever change, okay?
 
Come, give me a hug, and promise me you'll do this. You are nobodys doormat, and your family shouldn't be disrespecting you this way.
 
Let's have a cuppa. I made some really cute little pastry rosettes yesterday, and you're gonna love them.
 
 
...Mimi...

Thursday, June 23, 2016

A Homespun Year....Shortcrust Pastry Rosettes...

 
Aren't these too cute for words?
 
Fashioned from sheets of frozen Sweet Shortcrust Pastry, they're also delicious and incredibly easy to make.
 
Are you ready?
 
 
Lay the sheets of frozen pastry on some baking paper and allow it to defrost. Then using a small scone (biscuit) cutter, cut circles from the pastry sheets.

 
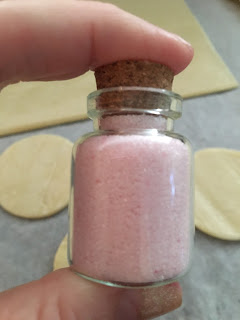
Cut as many as you can from each sheet, then sprinkle them liberally with  superfine sugar, edible glitter, cinnamon sugar, vanilla infused or lemon sugar.

 
Be fairly generous with your sprinkling, and make sure you go right to the edges.


Now roll those little circles up tightly, and press the edges to secure.


Cut them in half, or into three if they're too long to stand up (you end up with a sort of cylinder piece left over from the middle, but you can bake that too....), spread and flatten  the 'petals' slightly, and stand them on their bases...


...and line them up on a tray.


Bake at 175C fan forced for about ten minutes or until they're just browning on the edges.


Allow to cool.... and enjoy...that's it!


Pretty little dainty mouthfuls!
...Mimi...

Wednesday, June 22, 2016

A Homespun Year....Altered Clipboard Art & Free Printable Crown Collage...

 
These Altered Clipboards are all over Pinterest.
 
They come in varying degrees of complexity and ingenuity.
 
Some use vintage photographs for embellishment, others gingham and rhinestones (an odd combination, but it works on this particular project!). Brown paper, twine, found objects and old lace are other favourites.
 
My daughter and I find our own way with these. They are a popular gift amongst her Couture Stationery loving set, and the prettier, the better.
 
This one is a gift for a friend who has a birthday celebration this weekend. There is a co-ordinating Dreamcatcher under construction to pair with it...Dreamcatchers are another winner amongst teen girls, it seems. I'll share a photo of that later in the week when it's completed.

 
I actually meant for this to be a tutorial, but I neglected to photograph this one before, during and after embellishment, and the local discount store is currently bereft of the Craftboard style of clipboard necessary for this project. A task for another day, I guess.
 
Materials required:
 
Craftboard style office clipboard. These often come in pack of two for under $3.
Scrapbooking embellishments including flowers, rows and flourishes of pearls and rhinestones
Twine
Craft glue
Scraps of fabric and lace
Sandpaper or sanding block
Pearl effects paint
 
Then just:

(Note that this is a four step process, that you need several hours for, and preferably overnight drying time for the paint)
 
1. Sand the aluminium clip to give a more distressed and pearly look. I also hit this one with a hammer and nail in a couple of spots to make it more distressed and aged looking.
 
2. Paint the clipboard with Dulux Pearl  Effects Paint. One coat is sufficient, but you can do multiple coats to get a warm, pearly depth of colour if you wish. You just need to allow more drying time, obviously.
 
3. Glue embellishments as desired. We designed a Collage using PicMonkey that depicts a crown over some sheet music, wreaths and branches, and a few birds. You can download the Collage at the bottom of this post. The other embellishments used, were offcuts of lace we had on hand, scrapbooking bits and bobs, and a twine twirl, glued into place carefully as we twirled. A sliver of fine tulle dusted with faux sequins was layered over this, and pre-made rhinestone flourishes added to finish.
 
4. Finally, inexpensive rows of faux rhinestones and pearls, again inexpensive scrapbooking items, were added to the base of the clip. We were tempted to continue layering, but in the end, my daughter decided this was lovely as is.
 
 
The crown collage is a little creased from the gluing process (a hazard of allowing an impatient teen to take over the task...lol!), so we may decide to disguise this is some fashion. But I don't think it matters when it's this semi-distressed type of project, really.
 
We've made a few of these now in different colour schemes, and usually with this Olde Worlde touch. They're always enthusiastically received, both as an artwork, and as a practical piece of stationery.
 
Each one takes no more than an hour or two over a couple of days to complete, and costs well under $10, if not under $5.
 
Make a sweet altered clipboard of your own, or as a gift, and use my free printable Crown Collage to embellish it....
 
...Mimi...

Tuesday, June 21, 2016

A Homespun Year....Ribbon and Lace Storage and Organising...

 
I have been meaning to do this since forever. I have literally hundreds of metres of lace and ribbon, left over from, or accumulated for, various sewing projects.
 
Well...we all have our weaknesses, right?
 
Currently they bubble out of a box in a very unruly manner, and it was starting to mess with my thinking. I was getting Craft Room Fear. This is a very real condition where one fears entering the Craft Room lest one be attacked by feral ribbons and laces and such-like things. I see some of you nodding. You too, huh?
 
Just yesterday, I was minding my own business decoupaging an altered clipboard, when a rabid ribbon attacked my bottle of glue. It hung on for grim death and nearly ruined my work, but I wrestled it into submission. Phew.
 
Action had to be taken, but so many of the strictly organised methods I saw, left me cold, frankly. Plastic things and ugly boxes do little for my artistic eye.
 
This solution however, I adore already.
 
Neat rectangles of project cardboard, cut to whatever size suits my fancy, and decorated with French Script and roses. Now that's my kind of storage.

 
These are simple scrapbooking stickers, $2 for 40, and the same French Script stamp used for my Crepe Paper Roses that I posted last week. Remember them?
 
I chose to leave some cards of lace unstamped, just for the pretty alternating look. I may yet change my mind on that! I do rather adore that French Script stamp.

 
Aren't these the sweetest? I already feel the old enthusiasm returning. If nothing else, I cannot wait to organise hundreds of these with different embellishments thereupon, into neat burlap covered shoeboxes so that they beg to be viewed and used.

 
The red roses with the black ruffles, laces and ribbons is suitably dramatic.
 
Here's some soft vintage Baby scrapbooking bits, accented with gold and sparkle for my sweet Spring coloured satin and silk ribbons, and stamped calico (a gift from my friend Annabel). A whimsical crescent moon above deep French grey velvet ribbon, proclaims I love you to the moon and back...surely a sentiment for any day, any time....
 
 
...as is 'love always', and the sentiments of joy listed beside...
 
 
....what's not to like...


...and this darling baby, sleeping after a big meal, with puppy close at hand, watches over a favourite sage green double satin, that I love using as pillowcase trim...


There's more to come but I envisage soft images of Madonna and Child or tiny pennants of bunting for my baby blues and pale mauves, Cabbage roses and Romantic ladies for my pinks and reds, and sweet and sunny birds for my yellows and bronzes.
 
I'm as excited as a child on Christmas morning!
 
How do you organise your crafting and sewing pretties?
...Mimi...

Monday, June 20, 2016

Budgeting & Insourcing....Rainy Weekends....

 
How do you fill in time on rainy weekends?
 
I know lots of folk head off to a movie, restaurant or café to feel warm and cozy, and be entertained.
 
We like to stay home, snug as a bug in a rug, as my Mother used to say.
 
The rain was torrential in our part of the world over the last 48 hours. We had more than 20cms, or over 8 inches of rainfall in that time. We have a rain gauge and my husband takes great delight in reporting this information to me, so I can assure you that is correct.
 
For us, reading and snuggling under cosy rugs was the order of the day. This beautiful copy of Les Miserables was a Mothers Day gift, and I've been looking for an excuse to get started on it, so this was perfect book reading weather!
 
Our 19th Anniversary passed without comment from either of us earlier this month as we've been so busy, so in a fit of guilt, my Darling went out and splurged on not one, but two bunches of my favourite Columbian Roses. These I split up and spread all over the house, as both singles and smaller bunches. Do you love this thrifted vintage pink jug with apple green handle as much as I do?
 
 
 These ones just look like velvet, don't they...
 
 
Butternut pumpkin (squash) was inexpensive this week, so after roasting one whole in the oven for an hour or so to soften it, I discarded the seeds, removed the flesh and whizzed it with the stick blender to yield a lush thick pulp. Adding some milk, chicken stock cubes, ground ginger, garlic and onion to a third of it, made a gorgeous soup which we served with a dollop of sour cream and a drizzle of honey. There's still at least two more meals of soup left or perhaps a pumpkin and ginger slice or a pumpkin fruit cake in the making....hmmm...decisions, decisions...
 
 
I succumbed to marketing pressure and tried the Betty Crocker Gluten Free Cookie Mix. At around $4, it was a cost effective alternative to a café treat, giving us 16 large cookies, for just 25c each! Winner, I say!
 
 
When you're housebound, it's time to make a little more effort with making home the place to be.
 
Setting the table beautifully is always a priority here, so we did just that for breakfast, lunch, afternoon tea and dinner. Here's another little thrifted pretty....some vintage placemats housed in a sweet box, and with pretty English countryside scenery on them. Smaller than the usual placemats in my stash, I can only assume they are meant for a caravan. I use them for setting the Breakfast table. With pretty plates, and vintage cutlery, they're a lovely way to start the day, however gloomy.
 
 
A dreamcatcher was started for a teen friend...
 
 
...to go with a sweet altered clipboard for the same friend. We love doing these. A coat of pearly paint, sanding of the clip to make it more distressed looking, and then embellishments of all kinds to pretty them up. They're almost too lovely to use as clipboards. I'll be sharing a tutorial on how to make these, this week...
 
 
We enjoyed a couple of old favourites from our movie collection....The Others, which is sensationally spooky on a rainy afternoon, even if you have seen it a dozen times before...The Grinch which we love all year round, and a new purchase we hadn't watched yet, Mad Max Fury Road...a wonderful bit of escapism if you haven't seen it yet!
 
How do you spend a rainy weekend?
...Mimi...